CREATIVE AND FREE
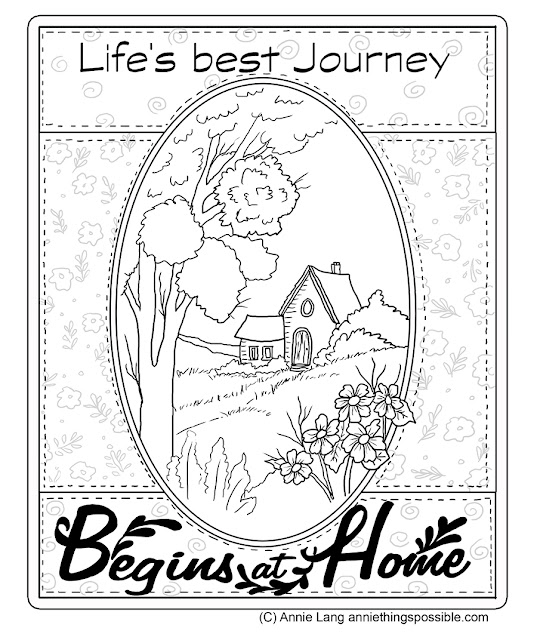
This painting was originally created in 2000 as a cover for a scrapbook
I was working on. It was made using acrylic paint that was thinned with
water in lieu of watercolors. I particularly like this medium because it
dries fast, colors don’t bleed together, it allows for a light transparent
watercolor “feel” to the work and lends itself well to my style of pen and ink detailing technique. If you think this project may be a bit too creatively challenging for you, feel free to use the pattern along with any medium you feel most comfortable with. The main objective here is to get creative and enjoy...so why not Go For It! Scroll to the bottom of this post to find the free pattern...just right click and save.
PROJECT INSTRUCTIONS
PATTERNED BACKGROUND
1. Transfer line art pattern onto watercolor paper.
2. Thin acrylic craft paint to a thin wash and paint and
basecoat the patterned background with pink and green.
3. Darken the pink with a touch of burgundy and the green
with a touch of black mixed in.
4. With a small brush, softly add the patterned background.
5. To finish the background, use a shader brush to apply
a layer of darkened wash around the border edges.
6. If you want to add stitching lines, use a fineline black
marker over the shading once it’s completely dry.
OVAL LANDSCAPE
1. Wash the sky area with just a touch of thinned blue.
2. Wash a bit of yellow onto the horizon line behind the house and trees.
3. Tap just a bit of light green over the horizon to create a hint of
trees behind the house.
4. Basecoat the house, tree trunk and pathway with light
honey brown wash. The door and windows are a darker shade
of honey brown and the rooftops are washed with dark brown.
When dry, you can darken areas by adding another layer of wash.
5. To create grassy areas and tree foliage, work with washes from
light to dark. Start from the background and work towards the
foreground. Using a stippler brush, I basecoated with yellow,
then added light green and then dark green. Shrubs near the
house are dark green and then stippled with a wash of dark green
mixed with black.
6. The blue wash used for the sky can be used to shade the foreground
flower perals. The centers were washed with yellow and then shaded
with thinned honey brown wash. Wash their leaves and a few stems
with yellow and dark green.
7. To create the foreground flower stalks, use a stippler brush to tap
in areas of the pink and burgundy used for the patterned print
background. Use a small round brush to pull up some thinned dark
green stalks.
8. Lettering is painted with dark green mixed with black, using
small flat brushes and the decorative foliage sprigs are painted with
a round brush and dark green.
FINISHING
1. Use a round brush to paint the border around the oval with a mix of
dark green and black.
2. Use a round brush to paint the rectangular outside border frame with
full strength ivory acrylic craft paint.
3. Outline and add all detail lines, twigs, grass, etc. with a fineline black ink marker.
PATTERN
NOTE: For personal use only...NOT FOR RESALE!

