Posts

Showing posts with the label instructions

Put Smiles on your Basket!

Image
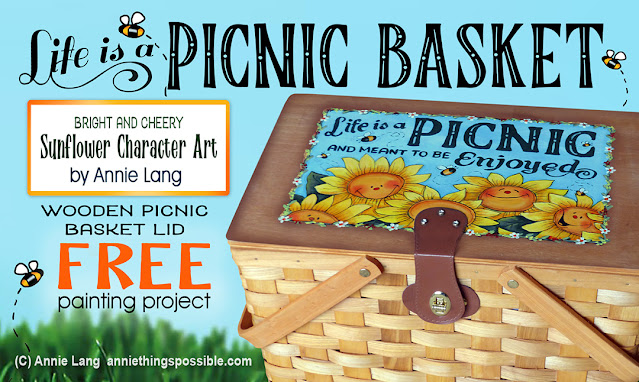
When the weather turns warm, it's time to once again get outdoors and enjoy every minute of the season!  Nothing could be more fun than an outdoor picnic with goodies served up from a bright and cheery picnic basket covered with smiles.  It's also a delightful shower or wedding gift that will not only be well used, but treasured for years to come.  I purchased this reasonably priced basket online from Amazon after I was unable to locate one with a wooden lid locally.   It arrived within a few days, was fabric lined, filled with accessories and was easy to paint.   You can find the FREE DOWNLOADABLE line art pattern and painting instructions for this project on the DIY page at my Annie Things Possible website.  Hope you enjoy because life truly is a picnic basket meant to be enjoyed!

Timeless Halloween Clay Pot Crafting

Image
While recently doing an internet search, I accidentally stumbled upon a Halloween project Crafts 'n Things published in their October 2001 magazine 20 years ago.  I was simply amazed at how many images of the completed clay pot projects were posted anonymously by crafting enthusiasts over the years, making this a timeless project that continues to make the Halloween season fun.   Though Crafts 'n Things magazine is now considered as a vintage craft magazine publication collectible, you can still find variations of many of the finished projects it has inspired being sold today through online EBay and Etsy stores, at craft fairs and bazaars as well as numerous Pinterest board pins.  There are also several sites offering a variety of back issues of the publication which can be purchased.  While I cannot provide the original patterns and instructions for the original project, I can provide basic project instructions so you can make your own.  You can use any size clay or plastic po

MATCH THIS

Image
When it comes to entertaining kids on a rainy day or finding group activities to keep the party guests entertained, this DIY game is an ideal way to not only keep them busy, but it's educational as well!  All you need are some fabric print swatches or patterned scrap papers, some cardstock, a pair of scissors and a bit of glue (I use spray adhesive). I've included the shape template I created to make my fabric swatch game shapes along with the basic directions.  The first time my 4 year old granddaughter used them, she immediately became engrossed in the colors, patterns and character images that were tossed about the carpet.  It didn't take her long to discover that the game challenge was not just matching single images like store bought card games, but seemed more like giant puzzle piece shapes that could be matched on both sides of each card! I created 20 different fabric card sets and it took her 30-45 minutes to complete the game, making it a perfect activity for G

LET'S PLAY HOUSE

Image
Every little girl needs a place of her own in the world of make believe.  I had originally purchased 6 paper mache house shaped boxes to create a Christmas village for the holidays.   However, once the houses arrived I decided that a happy neighborhood of houses for my granddaughters would be a more practical use as they would actually be put to use all year around.  I will add houses one by one until their collection is complete.  Toy figurines easily store inside these boxes and each house can serve as a delightful accent item on the guest room shelves.  This is the first painted house I completed and it was overwhelming received by a very happy girl! Here's how I painted the girls very first house and hopefully will inspire you to make your own happy neighborhood! SUPPLIES Darice DIY Crafts Paper Mache House Box Medium 8-1/2 .   I bought a package of 6 so the cost was only $5 each.   These houses are also available as sets with a large, medium and small sized box in each s

HATCH SOME EGGS

Image
Here's 3 fun little Springtime egg characters guaranteed to make you smile! They also make great basket stuffers,  Baby Shower decorations and Mother's Day gifts. Feel free to share this page link with your friends and family so they can get creatively inspired, too.  To download the patterns at the bottom of this page, right click and save image to your computer. Supplies: 4 1/2" paper mache egg for each featured character sponge brush for basecoating assorted brushes and liner brush 3"x3" scrap of white watercolor paper for bunny ears adhesive to attach bunny ears to the egg transfer paper Assorted Acrylic Craft Paints   as follows... Funny Bunny Hatchling:  white, black, baby blue, true blue, pink, burgundy, spring green, true green Happy Chick Hatchling:  bright yellow, light yellow, orange, burgundy, white, lavender, dark purple, pink, spring green, true green, black Peeper Hatchling:  bright yellow, light yellow, orange, pink, burgundy, white,

LISTEN UP

Image
Create Fun Ears for Elves, Leprechauns and Attentive Readers!  If you're looking for a quick, easy and really fun project, you can print and assemble this project in no time at all! Originally designed as a classroom storytelling prop for my Elf books reading sessions, this project can easily be used to create Leprechaun Ears for St. Patrick's Day or used as a Halloween costume accessory. Here's how to make Leprechaun Ears like the ones Little Emma is modelling for us in the sample photo... 1.  Right click the project page below and save it to your computer. 2.  Print the page.  Apply double sided adhesive to the back of the      page before cutting them out. 3.  To insure the printer ink won't bleed if the ears happened to get wet,      lightly mist with clear sealer or cover them with laminate or clear      Contact (R)  paper. 4.  Apply double sided adhesive to the back of the page before cutting. 5.  Assemble and finish the headband as instructed Ho