Posts

SPRING PARTYTIME FUN

Image

LET'S PLAY HOUSE

Image
Every little girl needs a place of her own in the world of make believe.  I had originally purchased 6 paper mache house shaped boxes to create a Christmas village for the holidays.   However, once the houses arrived I decided that a happy neighborhood of houses for my granddaughters would be a more practical use as they would actually be put to use all year around.  I will add houses one by one until their collection is complete.  Toy figurines easily store inside these boxes and each house can serve as a delightful accent item on the guest room shelves.  This is the first painted house I completed and it was overwhelming received by a very happy girl! Here's how I painted the girls very first house and hopefully will inspire you to make your own happy neighborhood! SUPPLIES Darice DIY Crafts Paper Mache House Box Medium 8-1/2 .   I bought a package of 6 so the cost was only $5 each.   These houses are also available as sets with a large, medium and small sized box in each s

HATCH SOME EGGS

Image
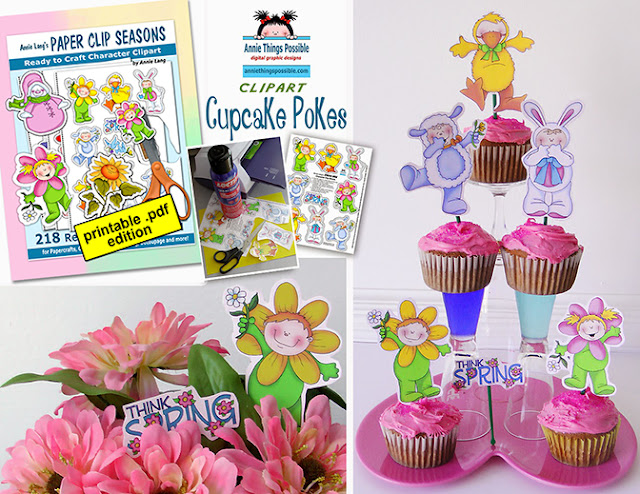
Here's 3 fun little Springtime egg characters guaranteed to make you smile! They also make great basket stuffers,  Baby Shower decorations and Mother's Day gifts. Feel free to share this page link with your friends and family so they can get creatively inspired, too.  To download the patterns at the bottom of this page, right click and save image to your computer. Supplies: 4 1/2" paper mache egg for each featured character sponge brush for basecoating assorted brushes and liner brush 3"x3" scrap of white watercolor paper for bunny ears adhesive to attach bunny ears to the egg transfer paper Assorted Acrylic Craft Paints   as follows... Funny Bunny Hatchling:  white, black, baby blue, true blue, pink, burgundy, spring green, true green Happy Chick Hatchling:  bright yellow, light yellow, orange, burgundy, white, lavender, dark purple, pink, spring green, true green, black Peeper Hatchling:  bright yellow, light yellow, orange, pink, burgundy, white,

K-CUP PARTY HAT

Image
If you've got K-Cups...You've Got Party Hats! Easily recycle or repurpose your k-cups and craft them into clever little hats you can use for a variety of events. The photo sample shows a simple brim made from a round woodlet, but you can use foam, felt or cardboard if you'd like.  Use black K-Cups to make cute top hats or paint them with bright colors and add lace, beads or other trims to create adorable little bonnets!  Here's how I made the sample project... 1.  Peel the foil lid off of a used K-Cup. 2.  Remove the grounds.  You can recycle them by mixing into your garden soil! 3.  Most k-cups have an inner filter lining so just pull it off. 4.  Most of the quality coffee brand cups have a plastic strainer.  I paint them and use as craft embellishments.  They make great dimensional  "owl eyes" or flower centers when you glue gemstones or felt circles to the center hole! 5.  Apply craft glue around the top edge of the k-cup and attach it to the cent

CRAFTING OUT SPACE

Image
It doesn't matter how old you are because everyone needs some creative space! For the past year or so, I've slowly but surely been introducing my young granddaughter to the world of imaginative arts and crafts.  Since most toddlers are easily frustrated, have short attention spans and a natural desire to "do it themselves", I only introduce one activity concept at a time.  This allows me to see whether or not she can handle the project or if it is an activity she enjoys. I discovered that threading noodles onto a string is not her cup of tea and that leaving her to paint "freestyle" onto surfaces of her choice comes naturally at her age.  So now that we've explored the many creative possibilities, I decided it was time to set up a crafting storage space in the guest room closet so she can choose her own supplies and projects to work on when she comes to visit. So whether you're a grandma, mom or day care provider who works with kids, I hope yo

LISTEN UP

Image
Create Fun Ears for Elves, Leprechauns and Attentive Readers!  If you're looking for a quick, easy and really fun project, you can print and assemble this project in no time at all! Originally designed as a classroom storytelling prop for my Elf books reading sessions, this project can easily be used to create Leprechaun Ears for St. Patrick's Day or used as a Halloween costume accessory. Here's how to make Leprechaun Ears like the ones Little Emma is modelling for us in the sample photo... 1.  Right click the project page below and save it to your computer. 2.  Print the page.  Apply double sided adhesive to the back of the      page before cutting them out. 3.  To insure the printer ink won't bleed if the ears happened to get wet,      lightly mist with clear sealer or cover them with laminate or clear      Contact (R)  paper. 4.  Apply double sided adhesive to the back of the page before cutting. 5.  Assemble and finish the headband as instructed Ho